
Spotify premium account brings numerous cool features and is undoubtedly the ruler of music streaming apps. Offering uninterrupted music streaming, the ability to download and listen anywhere while being able to skip without limitations. However, many of you decide to move on and cancel Spotify subscription, whether opting for another service, no longer using it, or simply cannot afford it. For whatever reason you wish to discontinue the service, here is how to cancel the Spotify premium subscription.
Are you looking for the best way to cancel Spotify membership? We will take you through the process of unsubscribing not only on Android but also on iPhone and computer systems. Also, if you are wondering how to save songs from your Spotify library, don’t worry, as we will introduce the most excellent AudKit Spotify Music Converter. With its fabulous features, help yourself in saving your favored albums on your devices. To figure out how, keep reading.
- Method 1. Cancel Spotify Premium on Android
- Method 2. Cancel Spotify Premium on iPhone
- Method 3. Cancel Spotify Premium on Computer
- Method 4. Save Spotify Music After Cancelling Spotify Premium
- Conclusion
Method 1. How to Cancel Spotify Premium on Android
Spotify Premium helps people to listen to their favorite tracks free of any ads. But what if you decide to cancel Spotify subscription? Or if it’s too heavy on your wallet? Fortunately, unsubscribing your Spotify Premium on Android is no big deal! Have a look below to learn how to cancel Spotify premium on Andriod:
Step 1: Click on settings on the right top of the screen after opening the Spotify app.
Step 2: Hunt for “Your Plan” by scrolling down the page and click on “Change Plans.”
Step 3: To cancel Spotify subscription, scroll to the base to “Spotify Free” on the next page and press “CANCEL PREMIUM.” You have now successfully unsubscribed your Spotify Premium.
Method 2. How to Cancel Spotify Premium on iPhone
Do you wish to learn how to cancel Spotify premium on your iPhone? If you don’t know how to do it, read below to get hold of it.
Step 1: Open your internet browser (Safari) on your iPhone. Steer to https://www.spotify.com.
Step 2: Enter your username and password and log into your Spotify account.
Step 3: Your account info page will show up after logging in. scroll lower to click on the option “Your plan.” Tap on ‘Change Plan’ on the same page.
Step 4: Scroll down to see an option to cancel Spotify subscription just below the “Spotify Free” unit. If you are sure to cancel Spotify membership, tap on “Yes, cancel.” Once again, the Spotify premium will restore the trail option for you.
Part 3. How to Cancel Spotify Premium on Computer
To learn how to cancel Spotify premium subscription on your computer screens in an easy way, go through all the steps and get started.
Step 1: Open Spotify on your browser. Log into your Spotify account.
Step 2: On the top right, click on “Profile.” Next, tap on “Account” in the drag down option.
Step 3: On the left-hand side of your page, select “Subscription.” Right beneath ‘Spotify Premium,” click on “Change or Cancel.”
Step 4: Under “Change Plans,” tap on “Cancel Premium.”
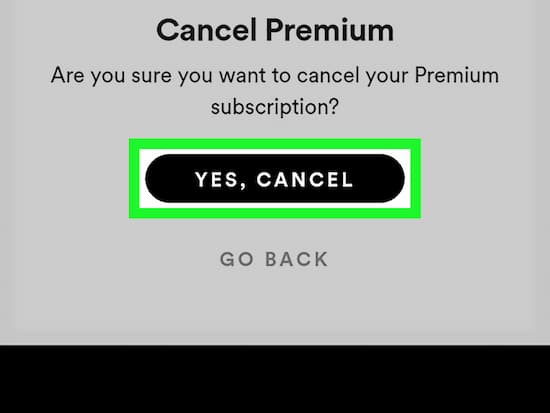
Step 5: Tap on “Yes, cancel” to cancel Spotify subscription.
Tip: How to Save Spotify Music After Cancelling Spotify Premium
Did you cancel Spotify subscription and still wish to keep Spotify music? Fret not as a mind-wrecking solution is there for you. You can even stream music on Spotify by downloading the most useful AudKit Spotify Music Converter. Then let’s explore its outstanding characteristics and learn how to stream Spotify music without Premium for offline listening.
AudKit Spotify Music Converter can convert Spotify songs to MP3, M4A, FLAC, and many file formats widely used. You can hit a terrific speed of 5x or much higher.
With no upper limit for song conversion, you can now download up to 100 soundtracks in just a few seconds. Also, listen to music offline with no ads distracting you.
Main Features of AudKit Spotify Music Converter
- Download Spotify music for offline listening without Premium
- Block Spotify ads from Spotify music
- Keep 100% sound quality and ID3 tags
- Batch convert Spotify songs at 5X speed
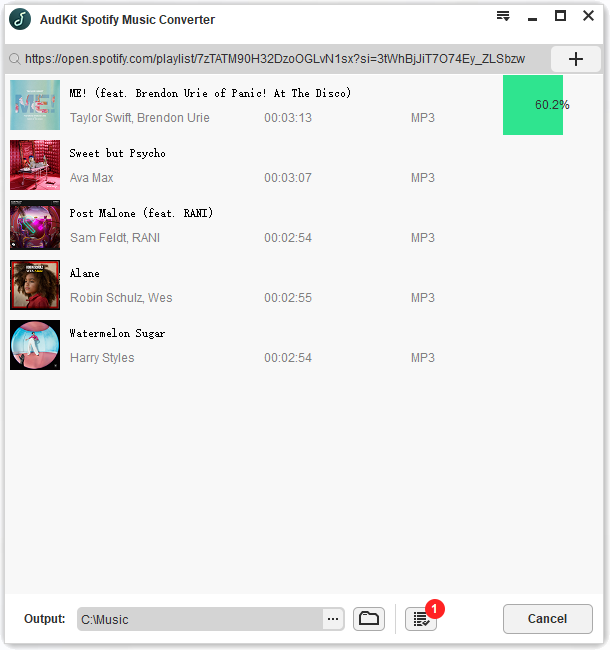
Step 1 Load Spotify playlists to AudKit one by one
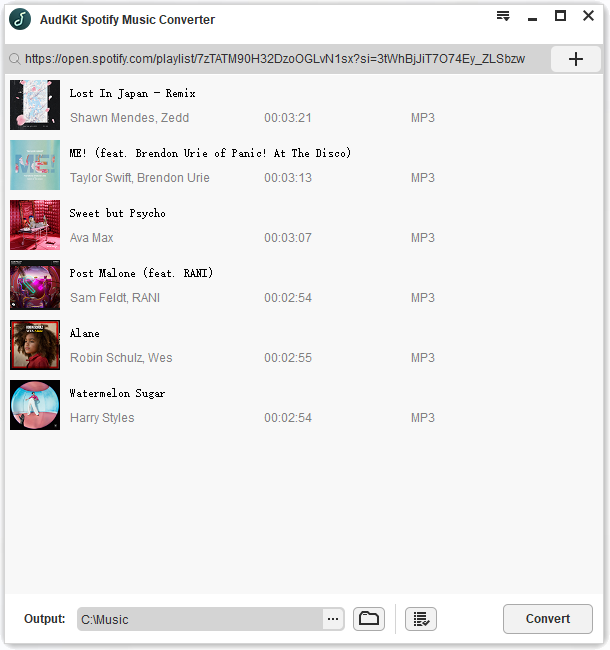
Open and launch the AudKit app from the desktop. The Spotify desktop app will be automatically activated at the same time. Enter into your Spotify library and open your own playlists. Copy and paste the URL of the playlists to the blank bar in AudKit’s interface. Then click the plus button to start loading. Please make sure that each playlist contains no more than 100 tracks since the limits of Spotify’s API. But there are no upper limits of the numbers of loading playlists. You can add all your playlists to AudKit one by one.
Step 2 Change output settings to suit for SoundCloud
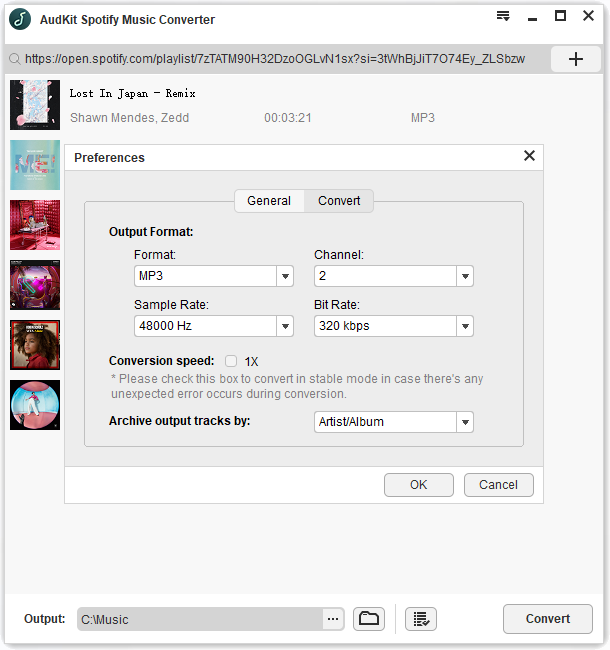
On AudKit’s interface, unfold the top menu icon and choose ‘Preferences’ then ‘Convert’. The settings page will show up for you to reset the output parameters, including formats, bit rate, sample rate, and so on. To be compatible with SoundCloud, you can set output format to MP3 or AAC format, bit rate to 320 Kbps, and sample rate to 48000 Hz.
Step 3 Download and Convert Spotify audios for iMovie
Tap on the ‘Convert’ button to begin the converting process. Wait until the whole conversion ends, then follow the on-screen tips to navigate the local folder that saves all converted Spotify files.
Conclusion
Wish to cancel Spotify subscription on Android, iPhone, or a computer without any hustle? Then you are at the right place! Learn how to cancel Spotify premium subscription by going through the easy-to-go steps. If you lost all your favorite songs, AudKit Spotify Music Converter is there with its unique features to save your day! Download music without any ad distractions at a terrific speed.

Elle Johnson
Elle Johnson has been working in the technology and music software field for over 5 years. She is dedicated to providing easy-to-use guides and effective tips to play music anywhere.